Rocking Tauntaun - With Plans!
A few months ago my daughter’s rocking horse died. For some reason it has a foam body without any reinforcement in the neck, so the neck didn’t hold out too long. Rather than try to fix the existing horse, I decided I would try my hand at making my own. After looking on the internet for ideas, I came across some pictures of rocking Tauntauns.
I decided that a tauntaun was definitely the way to go! I searched for plans online. Unfortunately all I found was a bunch of clickbait, and no actual plans. That gave me the idea that I should make some plans myself and put them online so others could also make rocking tauntauns. I’ve detailed the steps taken to complete my creation below.
Step 1: Initial Design
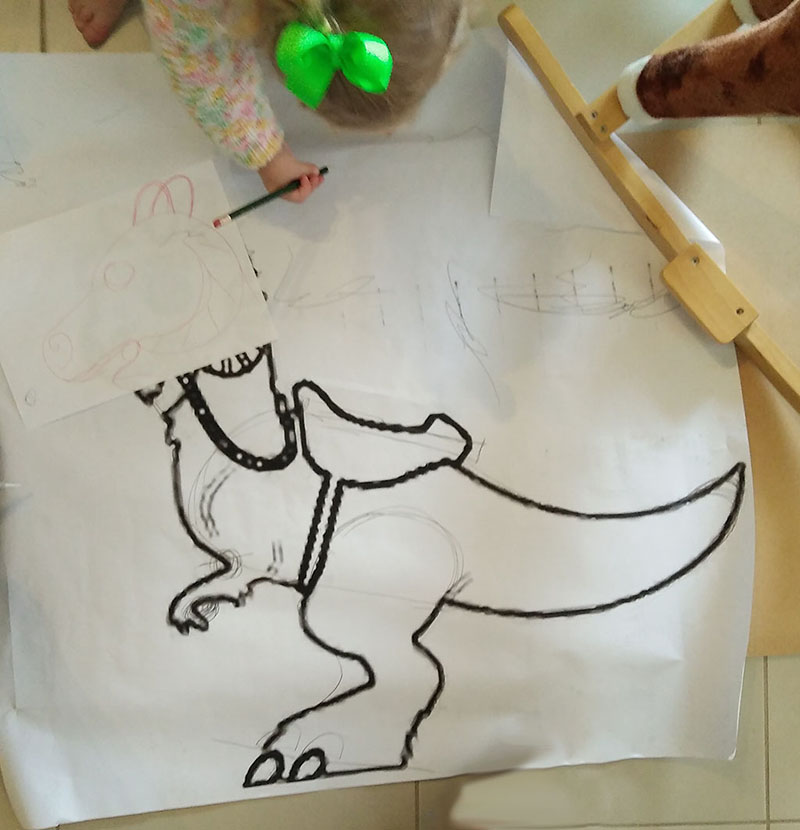
To start with, I searched for as many pictures of tauntauns as possible, and tried to find what sort of features I was looking for. I picked a picture and then printed it out in large format. As the picture I printed out had the tauntaun facing towards the viewer, I had to redesign the head. My daughter also decided to help daddy out with the design.
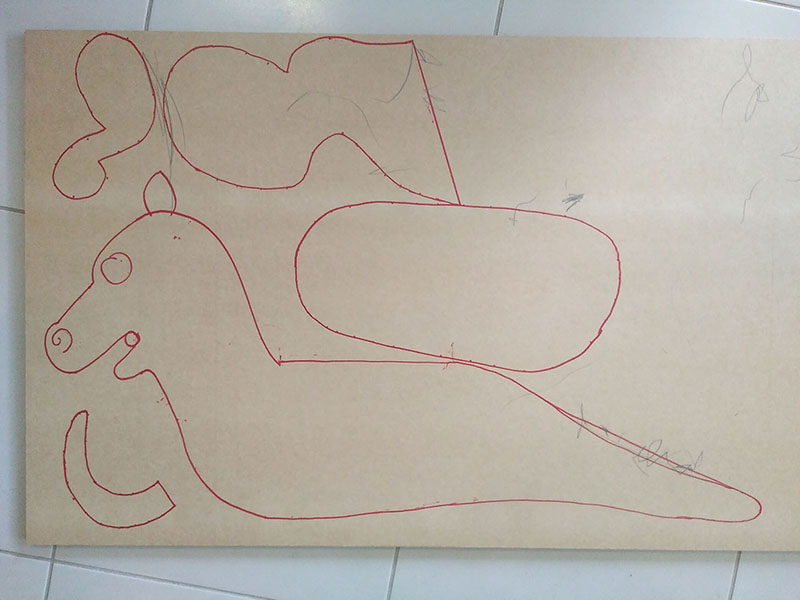
I took the sketch and then thought how it might translate into MDF boards. I had to change the alignment of the back so that it would sit flat, and also change the tail so it would not be dangerous while in use.
Step 2: Trace onto board
I then traced all of the parts onto an MDF board. I had a few revisions of the overall look before I settled on the final design. I then had to trace duplicates of the parts as needed.
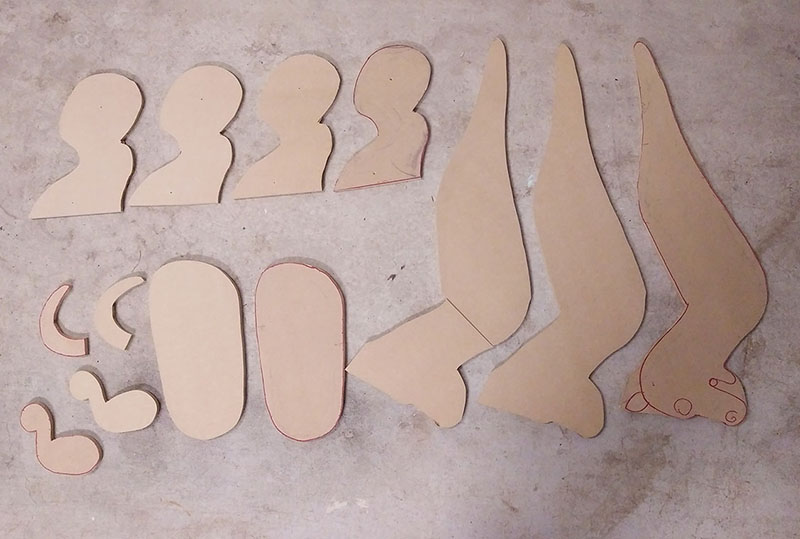
Step 3: Cut out parts
I used my jigsaw to cut the parts out. I then used those parts as templates for the duplicate parts. I don’t have a workshop, so most of the work with power tools was done on the concrete path beside my house.
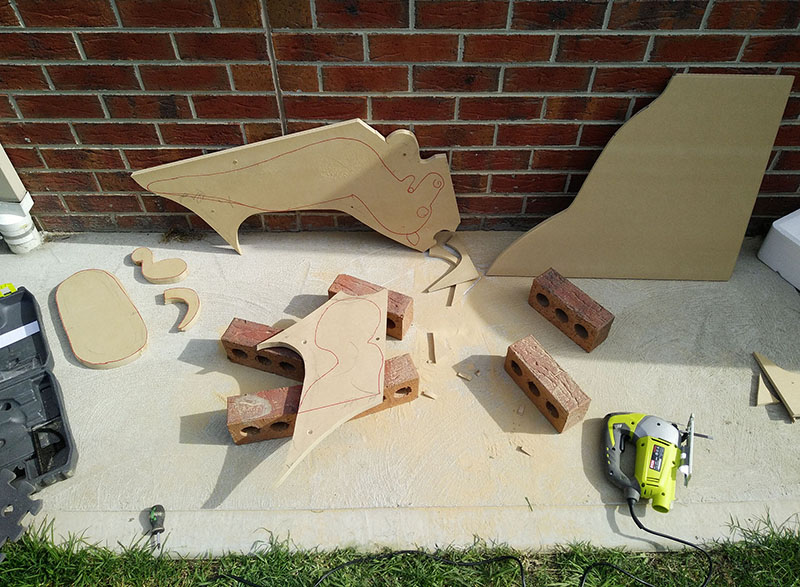
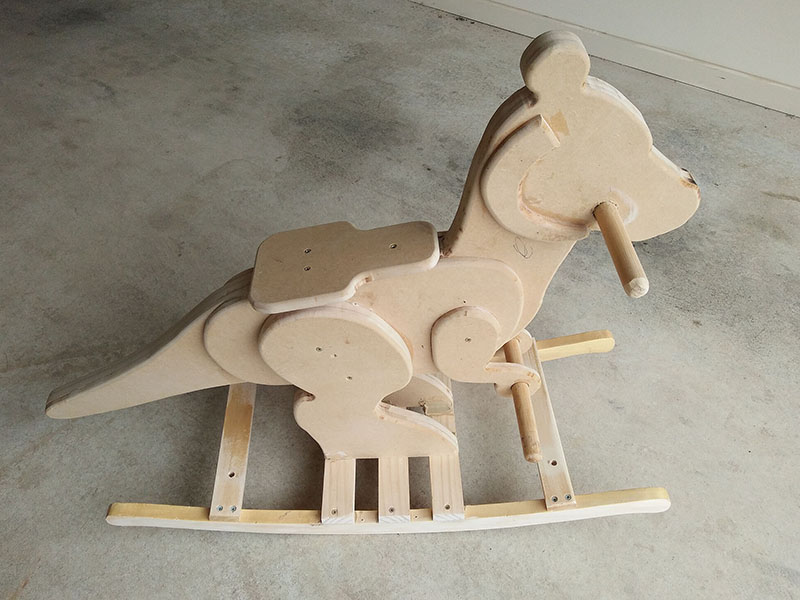
Here is a view of all the parts cut out.
Step 4: Glue parts together
I used PVA wood glue to join the parts together, then I clamped the parts until dry.
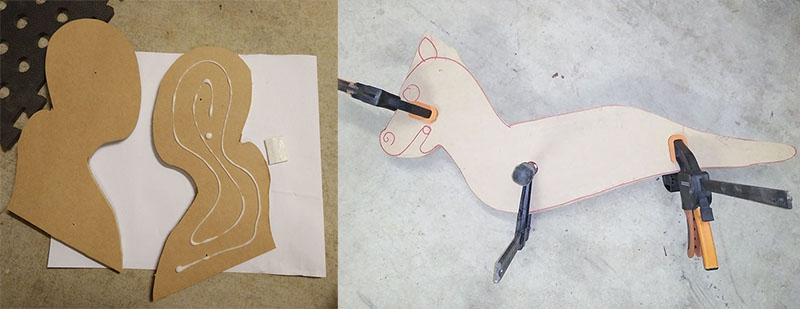
Once the parts were glued, I decided on the final ear and mouth shape for the tuantaun. I decided on rounded ears as it would be safest. I didn’t want my child getting impaled on pointy ears.
Step 5: Round edges
I then used my router with a 6mm round over bit to round off all of the outside edges before assembly. I forgot to take a picture of this part.
Step 6: AssemblyI used PVA wood glue again to glue all of the parts together. I didn’t have enough clamps for all the parts, so I used some screws and some nails to hold the parts together while the glue dried.
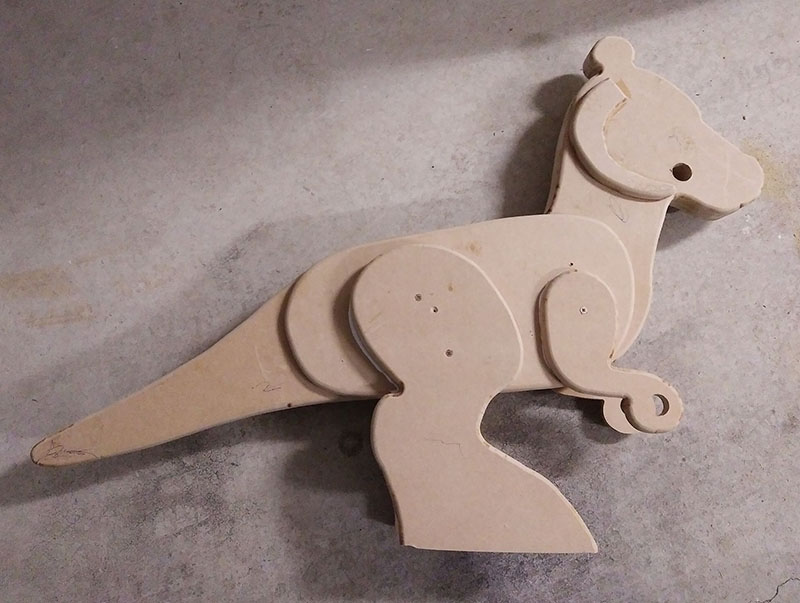
I then drilled 22mm holes in the head and arms for the handlebars and the footrest. I cut the handlebars and footrest out of a broomstick.
For the base I started out with what was left from the previous rocking horse.
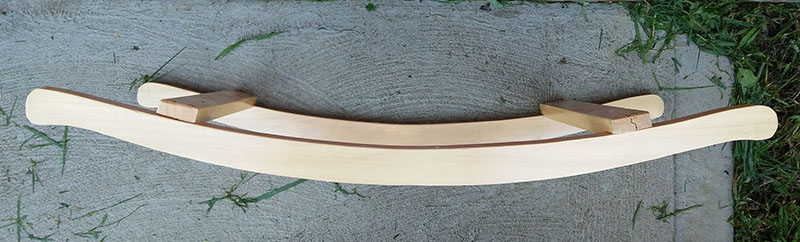
I added three extra cross bars, and used liquid nails and screws to attach the body to the base.
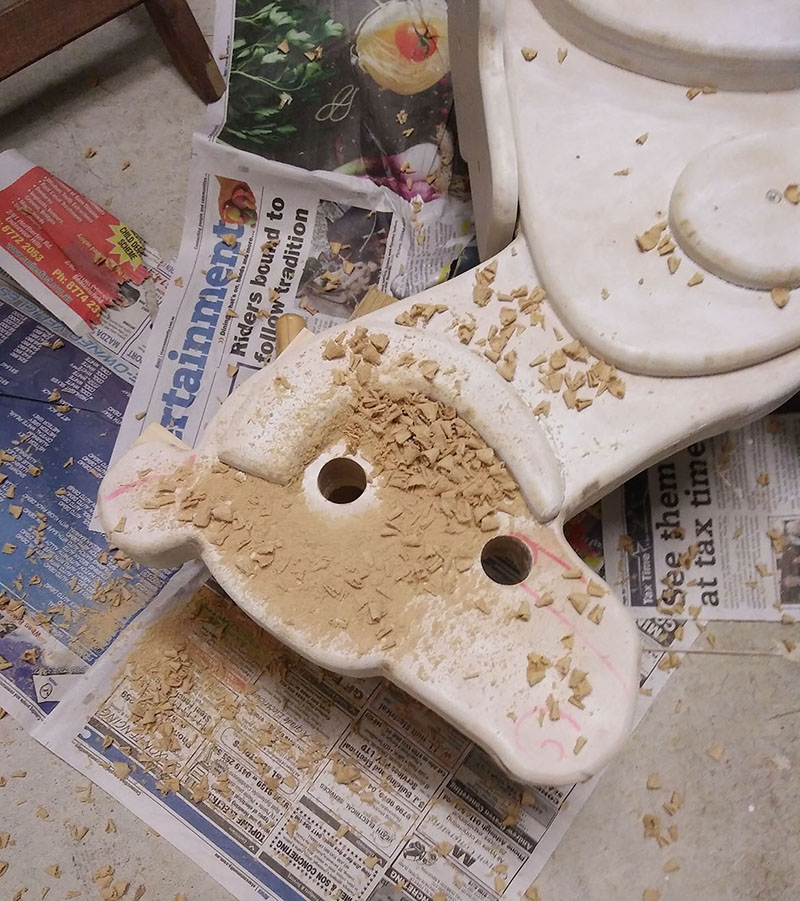
A quick test ride from my daughter showed the handlebars were much too far forward. I drilled another hole near the base of the horns to allow for better alignment, and then filled the original hole.
The saddle has a slight backward lean, which isn’t the best, but still works. I have fixed this in the plans to make the back and saddle flat.
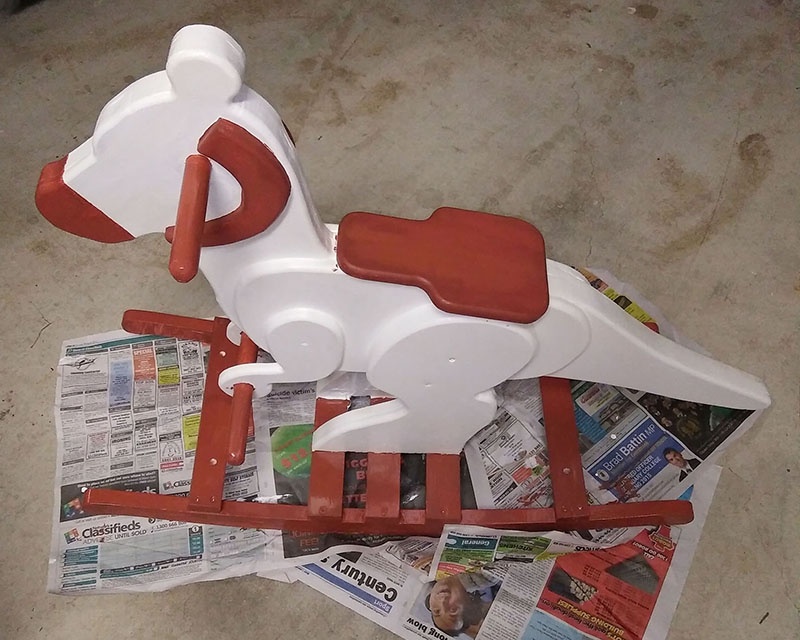
Step 7: Painting
I then painted the tauntaun. I gave it three coats of while house paint, then added details using cheap acrylic paints. I didn’t have a brown, so I mixed the colours myself. It dried a lot more red than I was hoping.
A trip to an art store gave me a much better brown, so I painted over the red. Some blue and green mixed into the brown gave me a darker brown to use as detail for the nostrils and the horns.
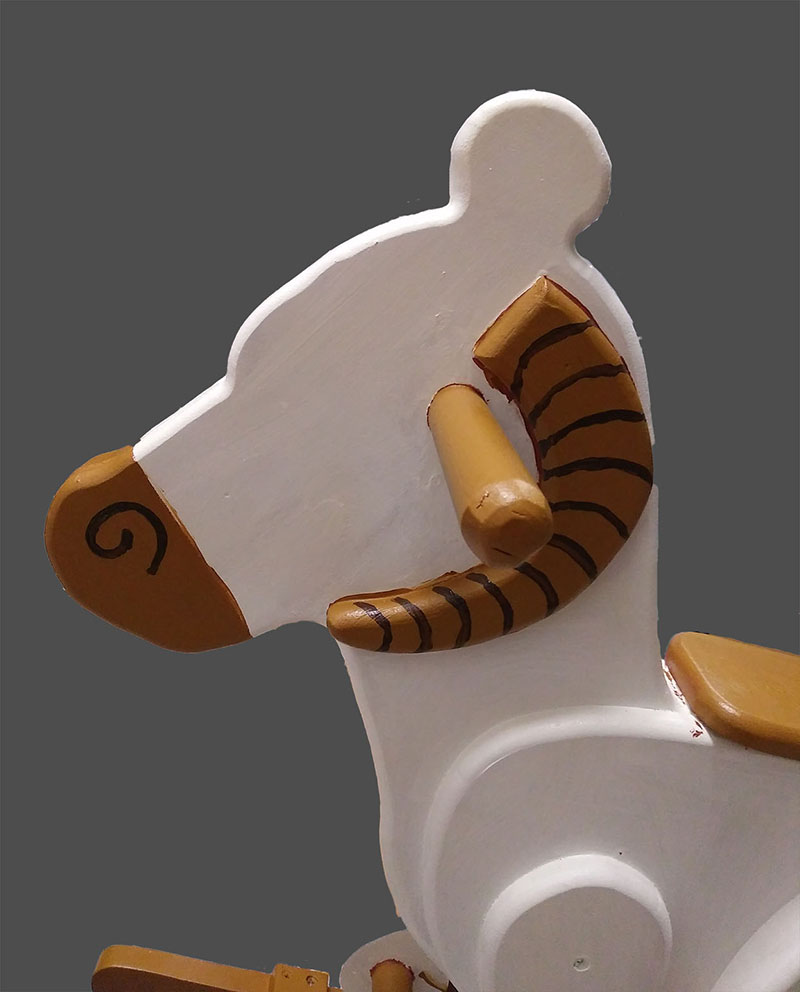
Completed: The finished Product
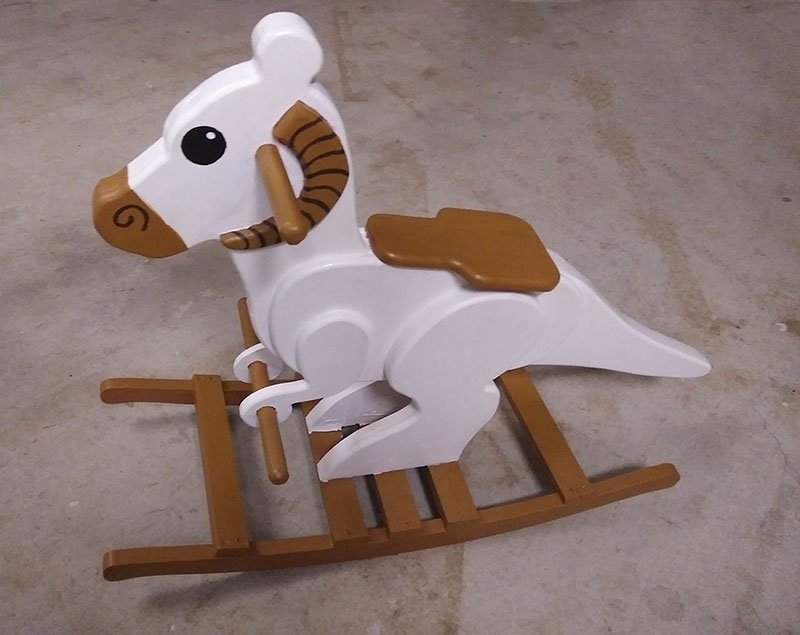
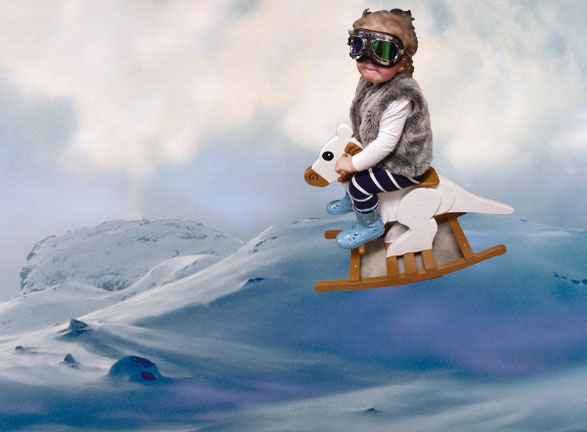
Here we have the completed rocking tauntaun.
Here is my daughter braving the cold of Hoth. The camera captured an interesting expression on her face :P
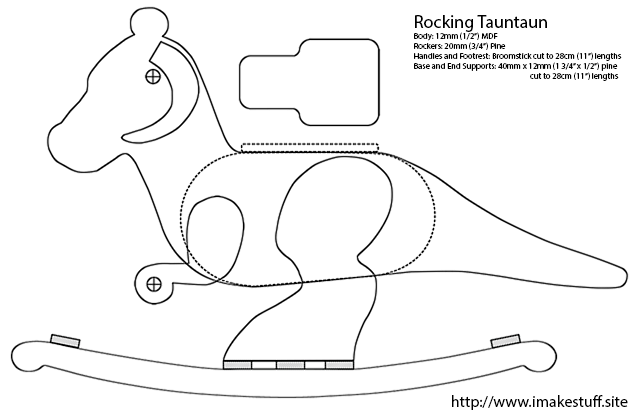
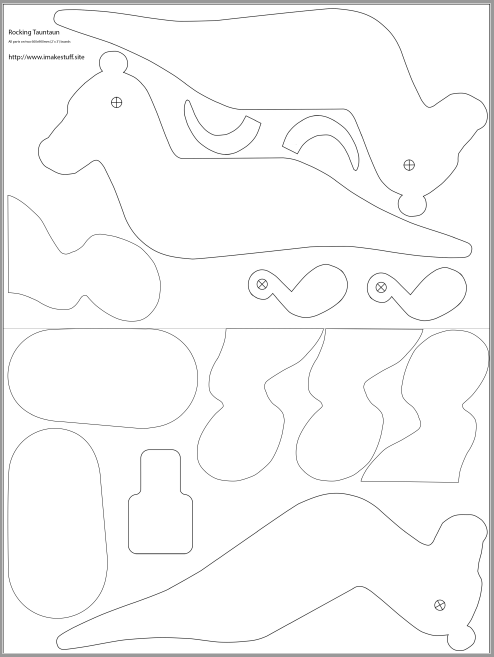
Plans for download
I’ve created two sets of plans for download. The first is the basic plan showing the basic plan and construction. The second shows how all of the parts can be cut from two 600x900mm (2′ x 3′) MDF boards (excepting the rocking base).
Click here to download this plan.
Click here to download this plan.